How to polish the headlights of your car in 5 steps
Do you need to polish your car's headlights? On many occasions when we talk about the headlights of our car, the security aspect rarely comes up. They are responsible for our lighting, and with lighting we say see and be seen. Its deterioration calls into question the safety of our car and we will know how to polish the headlights of our car in 5 easy steps.
But first we have to analyze why our headlights can deteriorate over time , what is the reason and what are the solutions. We must never forget that lighting is one of the pillars of the safety of our vehicle and that, in addition to reducing visibility, can have negative consequences at the time, for example, of passing the ITV . Therefore, we show you what the headlight polishing consists of and how the operation is done.
Why do our headlights deteriorate?
To understand what happens to our headlights, first we must analyze why they deteriorate. With deterioration we are not referring to glass breaks, but to its loss of transparency which results in loss of efficiency. It may not be so problematic at the moment, but when the crystals became completely transparent protectors, many ended up whitish or yellowish.
Even if we follow them calling crystals, currently they are usually manufactured in polycarbonate, a lighter material and, a priori, more resistant. The problem with this material is that its continuous exposure to the weather can make a dent, such as exposure to the sun , which ends up burning the outer surface of the lighthouse, or the erosion that appears with its use. Even the use of too powerful bulbs can damage this polycarbonate, although this way it will do it mainly inside.
What symptoms are there?
There are three ways to detect that our headlights are damaged . For the most absent-minded, it is probably at the ITV when the operator on duty tells us that our headlights have a problem. And the problem will bounce right into our portfolio, because a defective lighting is a fault.
Precisely lighting is another symptom that will indicate that something is not right. It is somewhat ambiguous because those who do not use the car in low light conditions or at night will not notice the difference, but those who do will see how their headlights no longer illuminate correctly because the light that crosses the Plastic cover is insufficient.
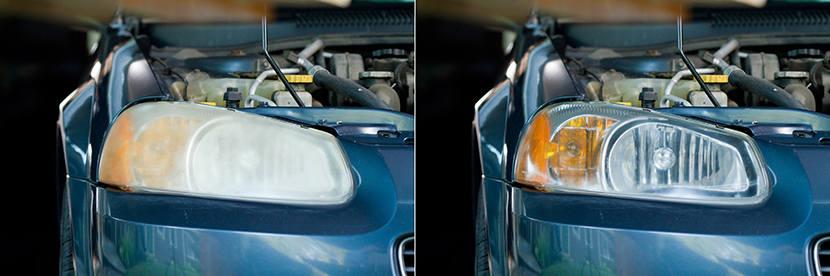
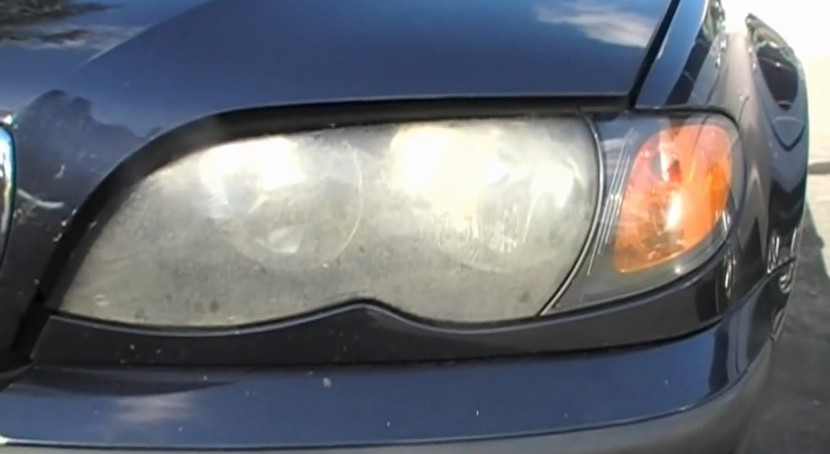
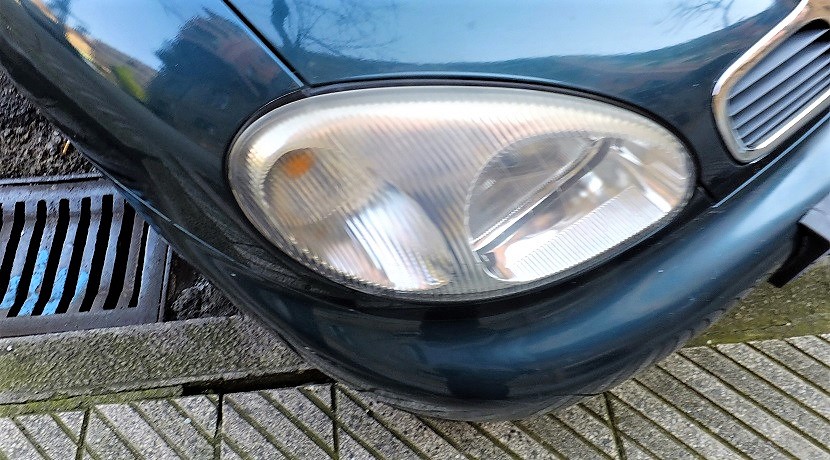
Finally, the simplest and fastest way to detect the symptoms is to look at our headlights and see that they no longer look like new. They have lost the transparency and, probably, we see a whitish or yellowish layer . Further, if we touch the headlights, we may notice a rough surface that can even stain our fingers with small pieces of material.
What are the consequences?
The consequences of deteriorated glass are, without going any further, a loss of lighting efficiency.In addition, the headlights serve to see and be seen, so other users of the road, whether cars or pedestrians and cyclists, may not see us and cause some type of accident .
How to solve it?
Just as there are different ways to detect the problem, there are other ways to solve it. The first one is the fastest and most effective, but also the most expensive: change the lighthouse. This way we will have a new optics but it will suppose to disburse the price of a new lighthouse , that is not cheap, but the manpower if we do not do it. What's more, replacing a headlight may not be enough for us, so we must add the price and labor of another lighthouse.
The other way is to polish the headlights of our car . It is a more rudimentary task and not as effective, but it will get us out of trouble and leave our headlights in a position to safely circulate again and pass the ITV without problems. This way is also cheaper because we can entrust the task to a specialist or even perform it ourselves, which is what we are going to deal with next.
What materials to use to polish headlights?
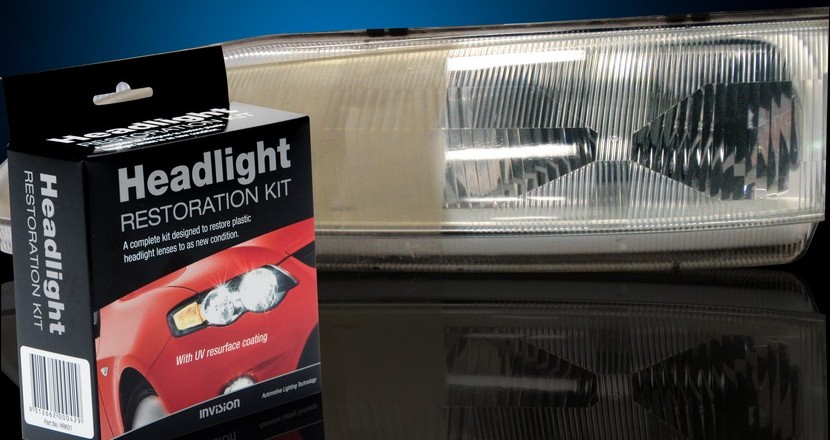
In the market there are different headlight polishing kits
To polish our headlights we can choose to buy a specific kit that some stores sell and that comes with the materials and instructions . Or do it on our own making us with the following material:
- Bodybuilder tape
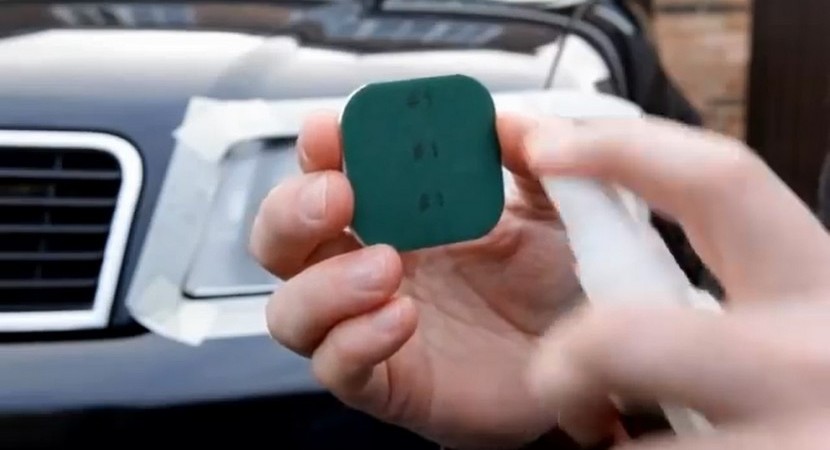
- 400, 1,000 and 2,000 grain grit
- Speed drilling machine variable
- Lint-free cloth
- Wool cloth
- Liquid silicone polish
- Water
Polish the headlights in 5 steps
Step 1: Clean the headlights and mask
The first step in polishing our car's headlights is to clean the surface to remove debris . For this we will use a rag and a bucket with water and some soap in which we will dip the rag from time to time while we pass through the lighthouse. It is important to make sure that we remove the remains of dirt, such as bird droppings, mud or grease.
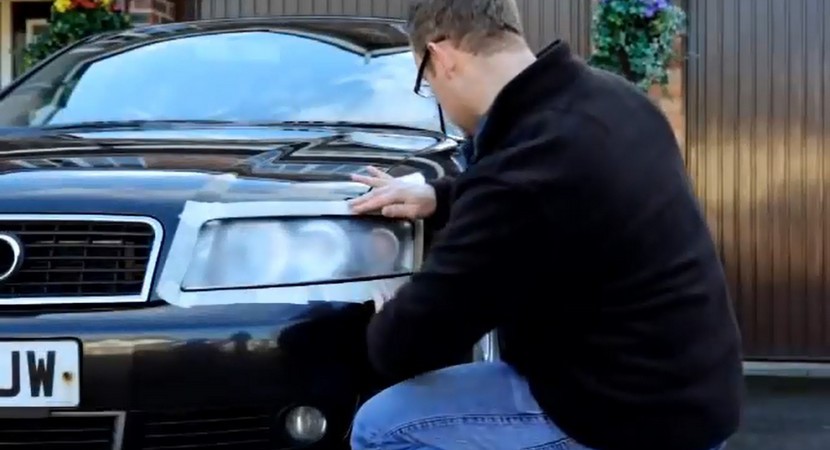
After having cleaned the headlights (first finish the work in one lighthouse and then continue with the other), we have to mask them to protect all the surrounding surfaces like the body or bumpers of the sandpaper and the polish. For this we use a bodybuilder's tape that we will apply carefully in the parts that we are not going to ruin. Additionally you can use some protective paper that increases the surface that we are not going to treat.
Step 2: Sanding with different grains
This step consists of removing the damaged material from the lighthouse. That is, we will eliminate the outer surface of the worn thermoplastic that favors the opacity of the headlight. Although it is strange we will wear more plastic to eliminate the bad part, and therefore we will use several sandpaper of different grain . The first thing is to see how damaged the lighthouse is, as the more abrasive sandpaper of 400 may not be necessary.
But we will start from a truly damaged lighthouse.We will put the 400 sandpaper in the drill and start sanding. There are two important details before you start. The first is that it should gently wet the surface while we are sanding. The second is that we should avoid sudden movements , tighten too much or focus on a single point. We can end up damaging the lighthouse permanently.
Therefore, our movements should be smooth and constant, sliding the sandpaper over the entire surface. Once finished we will clean again and, if all is well, the plastic should be white , as if it were frozen. There should be no shiny surfaces, and if so, we will repeat the process.
When we have finished with the sandpaper 400, of which we should not abuse, because it is very abrasive, we have to repeat the process with the sandpapers of 1,000 first and 2,000 last These are less abrasive and will eliminate the scratches to leave the glass more transparent. The process is the same, go dipping little by little, for example with a sprayer, smooth movements and without keeping the machine in one place and clean when finished.
Paso 3: Polishing the headlights
In this step we have to be sure that the headlight has been homogeneous, without damaged or shiny surfaces and that we have taken care to clean, again with water, the surface of the lighthouse. You also have to dry it so that the polish works well. It is important to take care of the drying of the adjoining parts and nooks so that no drops fall during the process.
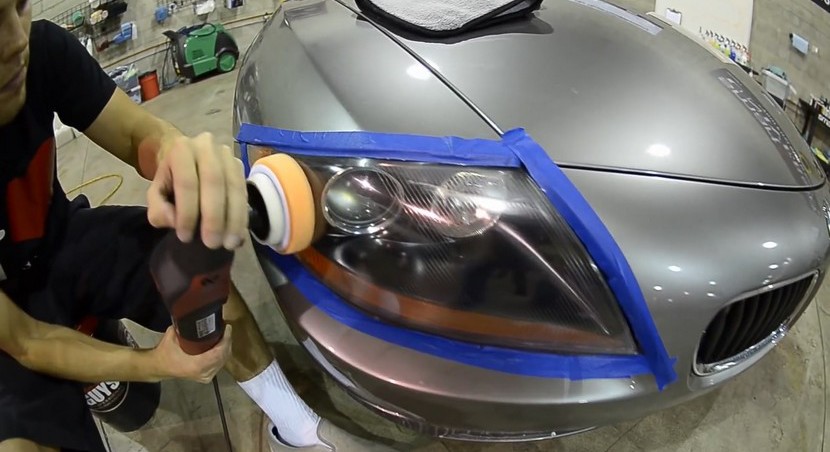
We have to use the liquid polish with silicones that we have on our list, a material that we will find on large DIY surfaces . Its use is simple. In the drill we will now place the wool disk on which we will apply a small amount of polish. On the headlamp we will also add polish and we will extend it all over the surface.
It is time to polish with the drill, again at low or medium speed, and without insisting on the same place. We will polish the whole surface little by little without tightening too much and we will see how our lighthouse starts to recover the transparency that we wanted so much. If we see that we have not obtained the desired result, it is worth repeating the process.
Step 4: Cleaning
When we have finished and we are in agreement with the result will arrive the moment to clean all our work and to contemplate of reliable form our results. It is now when, with a completely clean beacon, we can see if we have done the job well by seeing if the surface is now transparent and if touching it is smooth. Otherwise, we can repeat the polishing process.
To clean the headlight, we will have to repeat step 1, passing a wet cloth with soap to remove all the debris that may have accumulated during the work. . It is also convenient to dry the headlight to visualize a more realistic result: with water the plastic will always be brighter.
Step 5: Varnishing or sealing
Although this last step is optional, it should at least be taken into account. Polishing the headlights is not entirely effective, because we remove the protective varnish to the plastic and eventually it will be left the same as damaged.Your application is detailed in the instructions but consists of applying the varnish layer and letting it dry . That is why it will take us a little more time, because we will not be able to use the car and should be protected from any external agent that could damage the finish. We can go to a specialist for this step.
How long is the headlight polishing?
Talk about how long they will last us our sanitized headlights is very complicated. Polishing the headlights of our car is not 100% effective, and may not be as good as new. But in a way that is safe to circulate with them while improving the image of our car to, for example, sell it.
The duration of the polishing is limited , and it is that if it has happened before it is safest to return to deteriorate. The sun, the inclemency and the use give rise to that the headlights finish again not offering their better aspect and conditioning their effectiveness. Therefore, it will never be a solution as sharp as changing the lighthouse or, if possible, only the roof. Now, it will always be cheaper to polish.
Considerations when polishing headlights
A series of considerations must be taken into account when polishing our headlights. The first one, and in relation to the duration, is that is not a solution to be constantly abused . That is, sanding what we do is eliminating material, so that little by little it is wearing down. The recommendation is not to do this work more than 2 or 3 times because the plastic will end up being very thin and weak. It always depends on how abrasive our sanding is and the initial state.
Another consideration is to do the work in the two headlights . This is important because, unless one is completely new and the other deteriorated, we will not improve the lighting or take away the problems with the ITV if we decide to only repair one of them. Do not ever forget, both optical groups work together. Maintenance is essential , and it will suffice to clean them periodically, avoid washing tunnels with rollers, strong cleaners that can damage them or, as best prevention, store the car in a garage to minimize weathering.
Finally, and as a safety advice, if the ITV does not indicate that your headlights are damaged and, however, you deduce that your lighting or appearance is not adequate, do not hesitate to polish them. Sometimes it may be a detail left in oblivion but, we finish as we started, they are responsible for us to see and be seen.
We hope that with all the information we have given you in this article you already have lighter how to polish your car's headlights so that they light up again like when they were new.
Warning
Do not forget the rear lights of your car . You do not have to take care of them just for an aesthetic matter, the more damaged they are, the more light they will lose. Something not very advisable if you want to maintain the visibility of your car in low light.
Tips for polishing the headlights well
- Polishing machine is the one that gives better results. It would be worth it with a drill with an adapter.
- Liquid polishes work very well.There are several types, but we recommend those who come with several increasingly fine polishes .
- When you put the liquid on the sponge do not turn on the machine until Do not be in contact with the lighthouse . Otherwise the centrifugal force will cause the polish to come out in all directions.
- If you use a drill with a adapter, do not overdrive . Regulate the speed between low and medium if you have the option. If you do not have it, do not leave the trigger pressed continuously so that it does not reach its maximum speed. Go giving it small touches for a couple of seconds.
- How to control the polisher or drill is something more difficult, do not fall short with the protection of the other elements of the car. If you can, put on double the bodybuilder's tape to have more margin of error.
- If you fall on the paint of your car do not remove it with a cloth . To do it well, pour plenty of water on it and let it fall on its own. If you have a pressurized water gun it will be easier.
There is also the option to use a specific polish to use by hand instead of machine. Although the results are quite good, it requires a lot of work to achieve a finish similar to the polisher. They are also much more expensive than the toothpaste or bicarbonate trick.
Toothpaste Headlights?
The ingredients for which the toothpaste serves as a polish is that contains some abrasive particles . For example: silica, titanium dioxide or sodium bicarbonate. These compounds serve to keep our teeth clean while leaving the plastic of the headlights as new . To make sure you choose the right one, forget the transparent gel pastes. Buy one of the lifelong dense and opaque creams, which will usually be white .
How to use:
- Wash the headlights with glass cleaner to remove dust and other dirt.
- Put a good stream of toothpaste on a towel or microfiber cloth.
- Restrike it over the entire surface of the lighthouse making small circles. The longer the better, but with 5 or 6 minutes will be enough.
- Add more pasta as the one that is already on the headlight dries.
- Rinse with plenty of water and clean it again with the glass cleaner.
WD-40 or 3 in Uno more baking
This mixture seeks to join the cleaner properties that have the WD-40 or 3 in Uno oil with the > bicarbonate abrasive effect . It is advisable if the headlight has difficult spots such as embedded rust. If you use this mixture, you should be careful that the oil does not end up on the moldings or other plastic parts of the car. Bodybuilder's tape will help you avoid it.
How to use:
- Make a frame around the lighthouse with the bodybuilder's tape or similar.
- Mix the WD-40 and bicarbonate to achieve a dense mixture. To get an idea of the density you have to have, look for a creaminess similar to toothpaste.
- Restriguegalo over the entire surface of the lighthouse making small circles.